How to Build a BBQ Smoker Out of a 250 Gallon Propane Tank
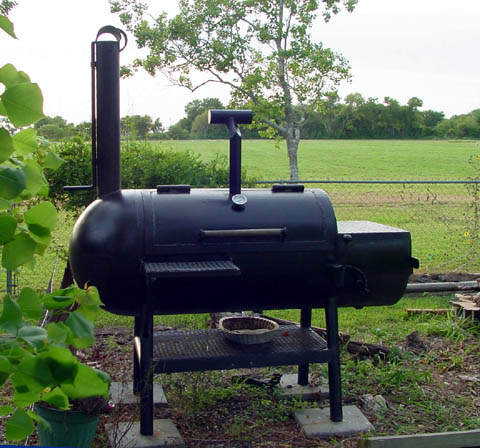
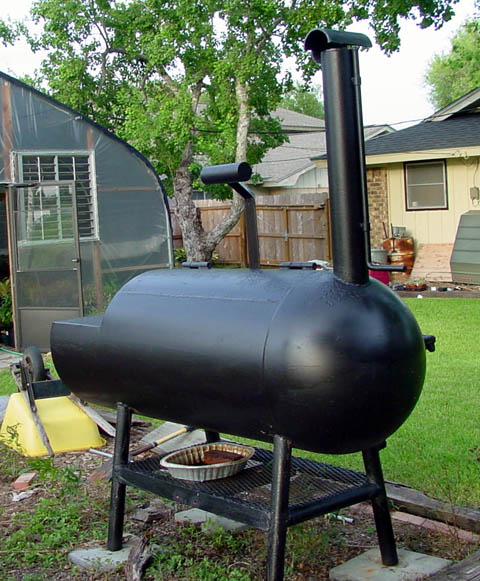
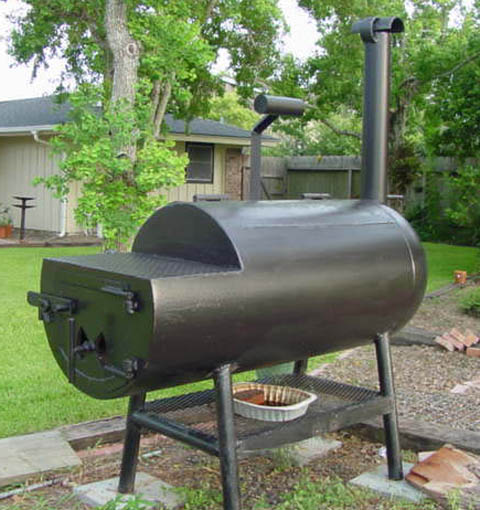
For this project, I decided to build a custom barbeque smoker out of a 250 gallon propane tank. I do not recommend nor am I advising anyone to use a 250 gallon propane tank to build a custom barbecue smoker. If you cut the tank and make a spark, there is a good posibility that it could blow up and kill you. An empty water tank makes a good barbecue smoker too, and it probably will not blow up. Here are a few pictures of the smoker I recently built.
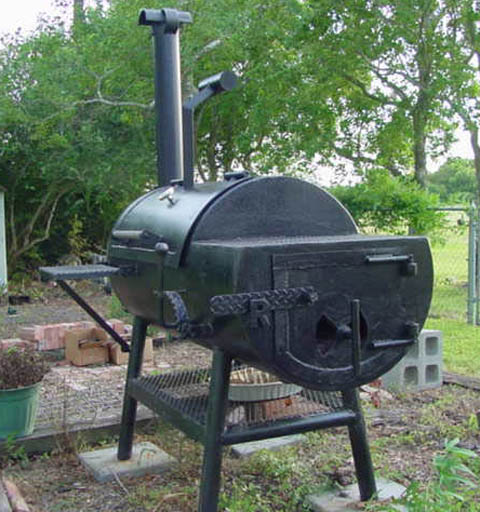 This is the first real barbeque smoker that I have built next to a double barrel smoker using two 55 gallon drums I built in college. It was a great barbeque smoker I might add.
I do not have detailed smoker plans for this project, but if anyone wants more instruction than is provided on this page, feel free to email me at: aaron@thesmokerking.com
Building The Smoker
After filling the propane tank completely with water and soap and letting it sit for two weeks, I built up the nerve to cut the propane tank with a torch. (Still full of water!) I made it through all of the popping and gurgling. I cut a whole cut on the right, round end of the tank. This was pretty scary. I then drained the water, blew the tank out with air for 30 minutes, and proceeded to cut the right end off at the factory-welded seam. That is why the tank is flat on the fire box side. Next, I moved the smoker into my buddy's shop and attached a hoist to the soon-to-be-pit to lift it so I could measure how long the legs should be.
After I determined the correct length, I built the stand, as you can see in the pictures above. The legs are 3 inch pipe, 3/8" thick. They maybe a little overkill, but the pit is located in Port Lavaca, on the Texas Gulf Coast, so the thicker the better due to rust. The bracing between the legs is angle iron I found at a welder's shop.
After I saddled out the top of the legs so they would match up with the contour of the barbeque pit, I lowered the propane tank into place. There are about 4 threaded holes on the top side of a propane tank. I cut a circle around the fittings and filled in all of the holes except for the one closest to the fire box before I put it on the stand. This hole is a good drain for the pit.
After I lined up the pit, I welded it into place. I do not have the exact measurements, but you can see where it rests from the pictures.
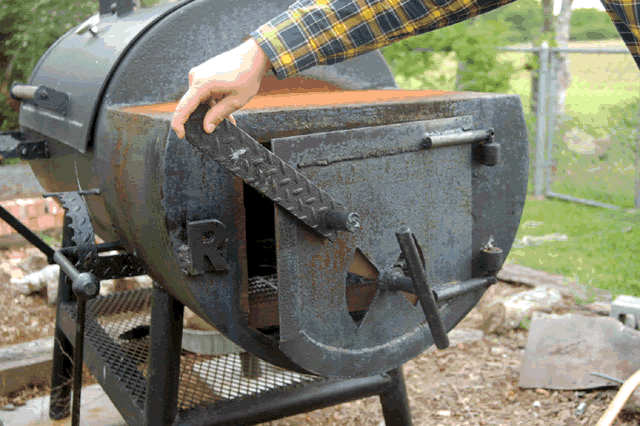
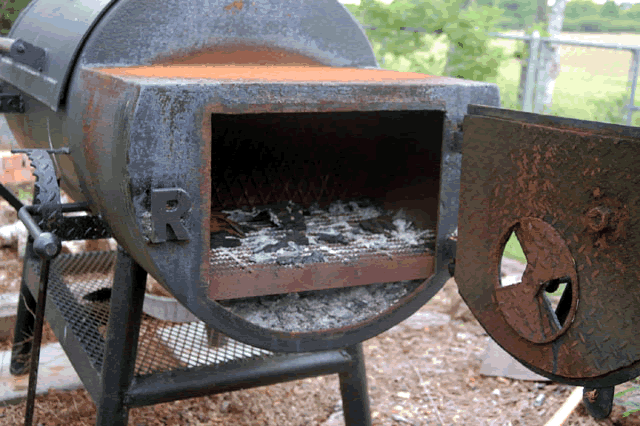 I decided to build the smoker firebox next. I decided to build the firebox 16" deep so it would hold quite a bit of wood. The pit is 30" wide, and I usually stack the wood in sideways. I used 1/4 inch plate to enclose the fire box to match the thickness of the propane tank. The wall between the firebox and the pit is made out of one complete circle. This is for strength and so I could make a damper to reduce the amount of heat that flowed into the smoker. The thicker the metal the better because over time, heat will warp thinner metal plating. You can get a relative idea of how I finished off the box by looking at the pictures.
 I then cut the door for the smoker. This is very tricky because if you cut the door out before attaching hinges, the door will warp. Draw out a door, cut the top, weld the hinges on, then cut out the rest of the door. I also welded a 1" strip around the edge of the door to help seal the pit off when the door is closed. The counter weight on top weighs more than enough to balance the door when it is opened. You may prefer to build two lids though.
The smoke stack is 6" pipe. A little bigger will work fine. The damper for the pit, as you can see, is on top of the stack. I have found that doing this works much better than building one inside the stack because after time the damper will clog up with sap from the wood, and it will be hard to shut.
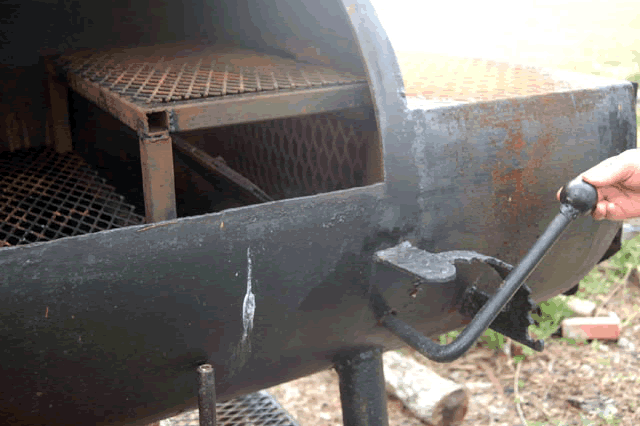 The damper on the smoker is a 6" piece of plate that has an ear which faces towards the side of the pit. I attached 1" steel rod to the damper which hung down the side of the stack, placed two collars that barely slid over the rod on the rod, and welded them to the stack. I then heated and bent the end of the damper control up so it faced straight out from the stack. The rain cap on top is a piece of the pipe cut in half.
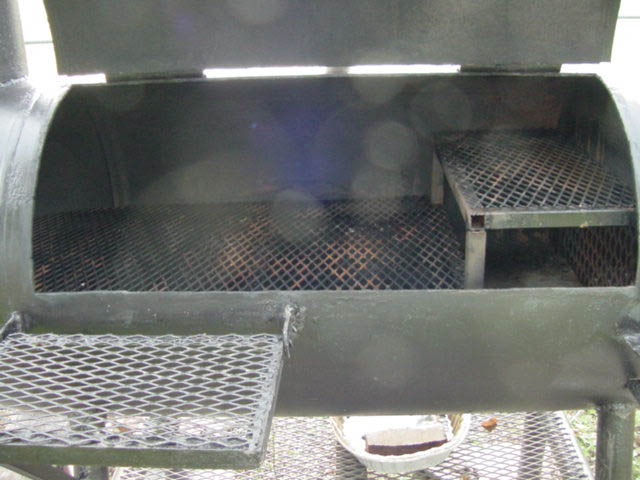
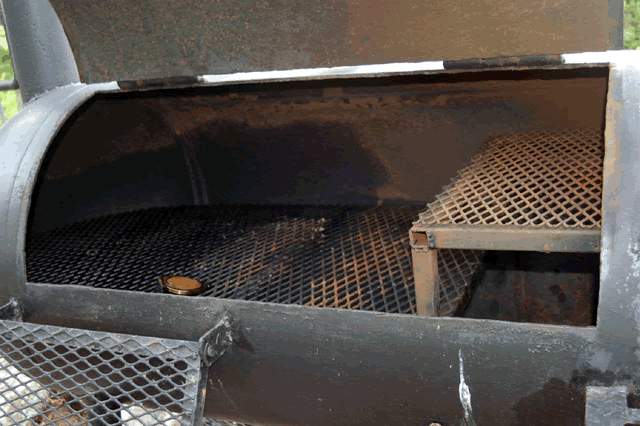
I built a ledge around the inside of the barbeque smoker, with cross bars, to hold the steel grating for the barbeque grill.
I hope I have given you a few ideas that may help you build your barbeque pit. Remember though, cutting a propane tank is dangerous, and often deadly. It is best to use a water tank.
A Few Notes on Building the Smoker
I did not drop the firebox as an experiment. Most pits have dropped fireboxes. I left this one on the same level to see if the pit would maintain heat with less wood. It sure as heck works.
After I built the smoker, I welded a plate inside the cooking chamber, to the top of the firebox inlet, angled down under the cooking surface. This directs the heat down, under the meat you are cooking and creates a more evenly heated environment in the smoker.
If you decide to build the smoker out of a propane tank, be careful. I filled mine with water but it was very scary and dangerous to make the first cuts.
If you have any questions or comments, please send them to aaron@thesmokerking.com and I will answer them to the best of my ability.
